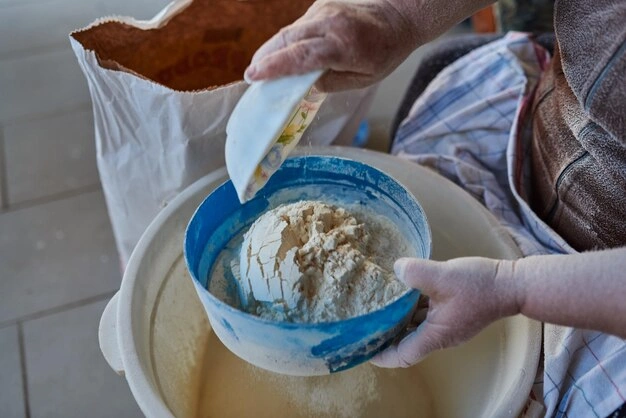
One popular item, sourdough bread, is widely recognized for its sour tang, chewiness and crisp crust. Traditional sourdough relies on a fermented starter — a mixture of flour and water that baits wild yeast and bacteria as a way to leaven the bread. But what if you don’t have a starter or you aren’t in the mood to wait days to create one? The good news is you can still do flavorful sourdough bread without a fermented starter! This guide will walk you step-by-step through the process of how to make sourdough bread yourself at home, with everyday ingredients and easy methods to get that classic sourdough flavor and texture.

Why Make Sourdough Bread Without a Starter?
Traditional sourdough starters are magical, but they’re also a time-suck, requiring your patience and care. For beginner bread-makers or folks with little time on their hands, sourdough bread without a starter may be the best bet. This method collaborates with commercial yeast or wild leavening to replicate the ancient flavor and texture of sourdough that anyone can manage. It’s also a wonderful way to have homemade bread without the trouble of a starter.
Ingredients You’ll Need
You will need the following components for this sourdough bread with no fermented starter:
- All-Purpose or Bread Flour: 500 grams (scant 4 cups). Bread flour contains more protein, which is what creates its chewy texture.
- Water: 350 milliliters (1 ½ cups or so). Set yeast in lukewarm water.
- Active Dry Yeast: 1 teaspoon. That will be the leavening agent.
- Salt 10 grams: (about 2 teaspoons) Salt does a couple things, it adds flavor and strengthens the dough.
- 1 teaspoon honey: or sugar (rain optional) This is to feed the yeast and add a bit more sweetness.
- Yogurt or Buttermilk: 2 tablespoons, optional. These add tanginess, resembling the sour of traditional sourdough.
Step-by-Step Instructions
Step 1: Activate the Yeast
In a medium bowl, combine lukewarm water with active dry yeast and honey (or sugar). Stir, and let the mixture sit for 5-10 minutes, until frothy. This means that the yeast is alive, and that it can therefore be used.
Step 2: Mix the Dough
For stand mixer if you have to—combine the bread flour and salt in a large mixing bowl. If you are mixing everything in a pile, just make a well in the center and pour all of the wet ingredients in there – including the activated yeast mixture. If using yogurt or buttermilk, add this now. Mix until a shaggy dough forms.
Step 3: Knead the Dough
It is a simple dough – this recipe will make a round loaf about 1-2cm thickTurn out to a lightly floured surface and knead for 10-15 minutes The dough should be smooth, elastic, and feel a bit tacky. If it feels too sticky, add a little more flour, but don’t overdo it.
Step 4: First Rise
Place the dough in a lightly oiled bowl, cover with a damp towel or plastic wrap and leave to rise in a warm place for 1-2 hours, until it doubles in size. This is the first phase in a two-phase fermentation process, a phase called bulk fermentation, in which the yeast creates bubbles in the dough.
Step 5: Shape the Dough
When the dough has risen, punch it down gently to deflate any air bubbles. Turn it out onto a floured work surface, and form it into a round or oval loaf. You can also make it in a loaf pan, if you want something that looks a little more uniform.

Step 6: Second Rise
Let the shaped dough rest on a parchment-lined baking sheet or in a proofing basket. Cover and let rise for another 30 minutes to an hour. And this second rise — or proof — allows the dough to develop even more flavor and structure.
Step 7: Preheat and Prepare
Preheat the oven to 450 degrees (230 ) while the dough proofs The lid of the Dutch oven or a baking stone can also be placed in the hot oven. These appliances help create an environment filled with steam which is what you need if the bread is to have a crispy crust.
Step 8: Score the Dough
Before you bake, score the top of the dough with a very sharp knife or a bread lame. It helps the bread open up nice and even in the oven, creating a beautiful pattern.
Step 9: Bake the Bread
For those using a Dutch oven, carefully turn the dough into your heated pot. Cover with lid and bake for 20 min. Then, uncover and continue baking for another 20 to 25 minutes, or until the crust is golden brown and the internal temperature registered 200F (93C). For a baking sheet, glaze the top with milk, and create steam by pouring water hot on the bottom rack, bake for step on 30-35 Minutes.
Step 10: Cool and Enjoy
If using the oven, remove the bread once baked and let cool on a wire rack for at least 30 minutes before slicing. It helps the crumb firm up, ensuring perfect texture.
Tips for Success
- Use Quality Ingredients: Use a high-quality flour and fresh yeast — they make a world of difference in flavor for the final product.
- Don’t Rush The Rise: Allowing the dough to rise produces an airy, light texture.
- Steam: Steam is crucial to keep that crust crisp. If you don’t own a Dutch oven, you can spritz the dough with water while it bakes, or put a pan of water in the oven.
- Get Creative with Flavor: Add the dough by infusing it with herbs, seeds or nuts for a flavorful twist.
How to Achieve a Sourdough-Like Flavor
Achieving the signature sourdough tang can be difficult in such a case if you’re starting without a fermented starter. Some tips to enhance the flavor:
- Use Yogurt (or Buttermilk): Those provide acidity, which lends the bread a subtle tang, as a sourdough starter would.
- Method: Cold Retard: Place into fridge overnight. Slow fermentation adds more complexity to the flavors.
Frequently Asked Questions
Is It Possible to Use a Different Liquid in a Gluten-Free Sourdough Bread?
Yes! For the bread flour, use gluten-free flour blend and add xanthan gum to give the dough some binding action. Continue doing so, changing the water as needed.
How to Store Home-Baked Sourdough Bread?
Wrap your bread in a paper bag, or store it in a bread box, at room temperature for three days. For longer term storage, wrap tightly and freeze up to 3 months.

Why Is My Bread Dense?
Too little kneading (too little gluten development) or a rise that is too long, or use of too much flour, can create a dense bread. Focus on the instructions — and the measurements of the ingredients, too.
Conclusion
Sourdough bread is easier to make than you think, without a fermented starter! With a few straightforward ingredients and techniques, you can make homemade sourdough as delicious as the store-bought stuff. This method is ideal to satisfy your sourdough cravings — whether you’re a novice baker or a pro — without the upkeep of feeding a starter. So roll up your sleeves, preheat your oven and prepare yourself to bake your very own damn loaf of sourdough bread. Happy baking!


